I have a 72,000 mile 2014 JK Unlimited Rubicon and began getting P0302 P0306 and P0300 errors.
Note: most of this links to Amazon parts because that’s where I buy everything, anyway. I’ll include part numbers so you can Google them for yourself.
Everything I put into the Jeep is Mopar – no aftermarket parts.
I bought an ODB2 BlueTooth dongle and an extender cable because I was knocking my knee into the dongle when plugged in (pro-tip: in the Jeep, loop it around the little speaker on the dash and it will stay put). Then I got Torque app . This ensemble works Ok. It gave me enough information to figure out what was going on.

As you can see, there were some historic errors, as well as other miscellaneous errors. I had cleared the logs and there were other cylinder misfires, as well.
After watching endless Youtube Videos (I added the best one below), I decided to replace the spark plugs and buy an injector just in case. Here’s the parts rundown:
- 6 Spark Plugs – Mopar SP149125AE $65
- 1 Injector – Mopar 5184085AD $70
- 6 Intake & Plenum Gaskets (I bought both types in case) Mopar 5184331AC & 5184562AC. Make sure you buy 6 – you may end up just buying one. $70
- Panel puller/fastener remover – you really need one of these to get at all the christmas tree fasteners
- Hook set – one of the most underrated items – really good for getting those locked connectors open, pulling an o-ring out of the fuel rail, etc.
- Magnetic parts tray – seriously, makes a world of difference when working with tools and a place to put the nuts/bolts/screws without losing them.
Tip: buy a new air filter. I got a K&N filter about 2 years ago and MPG consistently went up by 1-2 MPG
I have bought other things from Original Auto Parts Xpress on Amazon and they seem to ship quickly (even in Covid times) and the parts are exactly as they should be.
What you will need to do the job:
Getting around the engine bay is difficult, but can be done with just a 1/4″ drive, some extensions, and a spark plug puller that will fit. But, since this is how I did it, here’s what I used:
For the spark plugs only:
- 10mm short and long 1/4″ socket drive with 1 short and 1 long extension
- 8mm short and long 1/4″ drive
- The same stuff but with 3/8″ socket drive (mainly for the spark plugs)
- Flexible connectors will make your life easier
- Torque wrench – you should really use a torque wrench for the intake and for the spark plugs (I got a GearWrench 3/8 in. 5ft./lbs to75 ft./lbs. Drive Flex Head Micrometer Torque Wrench from Home Depot). You need the low end of the torque range for the intake bolts and spark plugs.) 13 foot pounds for the spark plugs. 7 foot pounds for the plenum.
- Spark plug puller – I got a Sunex set from Home Depot. Available on Amazon, too. You need a thin wall socket! Also, these holes are really deep, so you need a long one.
For the injector:
- T-30 Torx head
How to do it:
I’m going to use this excellent video, but tell you a couple things along the way to make your life easier. Watch this first a couple times. I’m going to go out of sequence a bit in the explanation, but it will go much quicker and be easier.
- 10mm socket – take of negative battery terminal and move it away
Left bank spark plugs (facing the car)
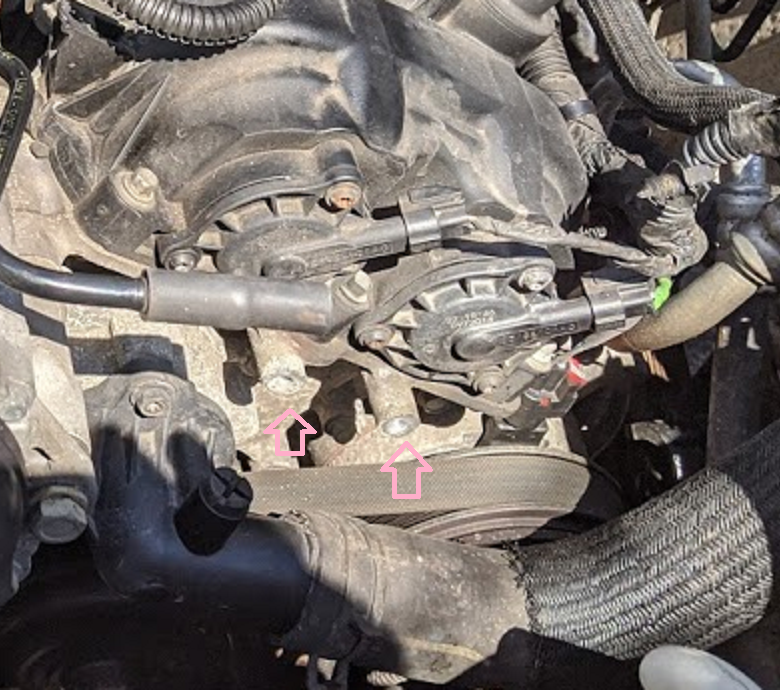
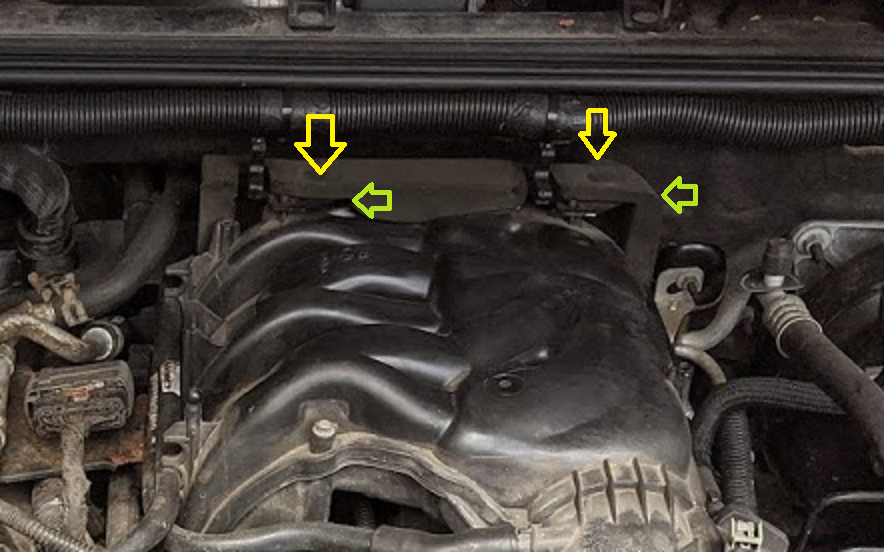
- 10mm socket. This will be a lot of things to use the 10mm socket with all at once. Unscrew the green bolts holding in the coils (they will be kept in the coil). Remove the orange 10mm nuts and screws. This will make taking off the intake much easier. Lift those pipes off the bracket and move over to the left. They need to be out of the way later.
Here’s the other side of that bracket with the orange arrows above.
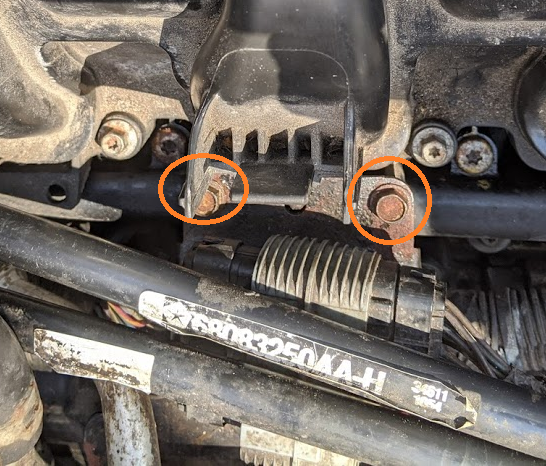
- Remove these two 10mm long bolts.
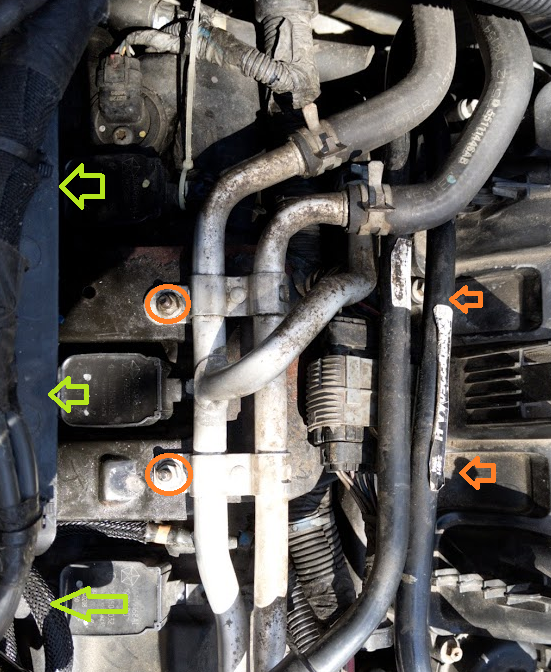
- Using the fastener remover, pop the two yellow arrow fasteners, then remove the green 10mm bolts and brackets. Then remove the foam piece. He only does this at 4:18. Easier to do it with the 10mm since it’s already ready to go.
- 8 mm socket (or flat head screwdriver for worm clamps) – remove snorkel and intake tubes. Be careful of the intake sensor – don’t yank on the tube
- At 1:46 he uses a pick to open the red safety lock first. Mine was slightly different and fell out, never to be seen again.
- At about 2:24 he is removing all the fasteners. Do that. Now, take the 10mm and remove the nuts in those two brackets.
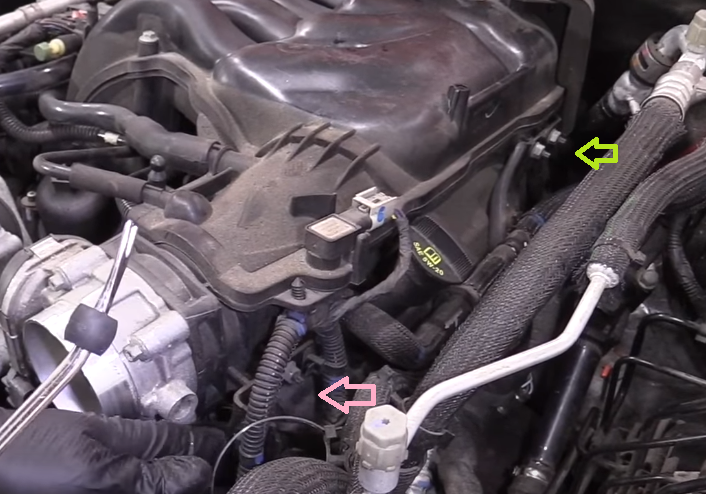
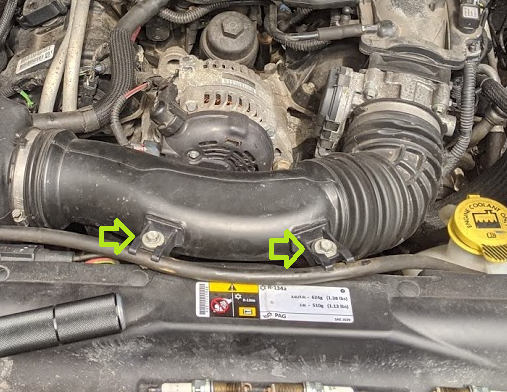
- The pink bolts attach to a bracket. Underneath the intake (the metal part) are 2x 10mm bolts holding that bracket in. Remove the bracket! This will make removing the intake so much easier!
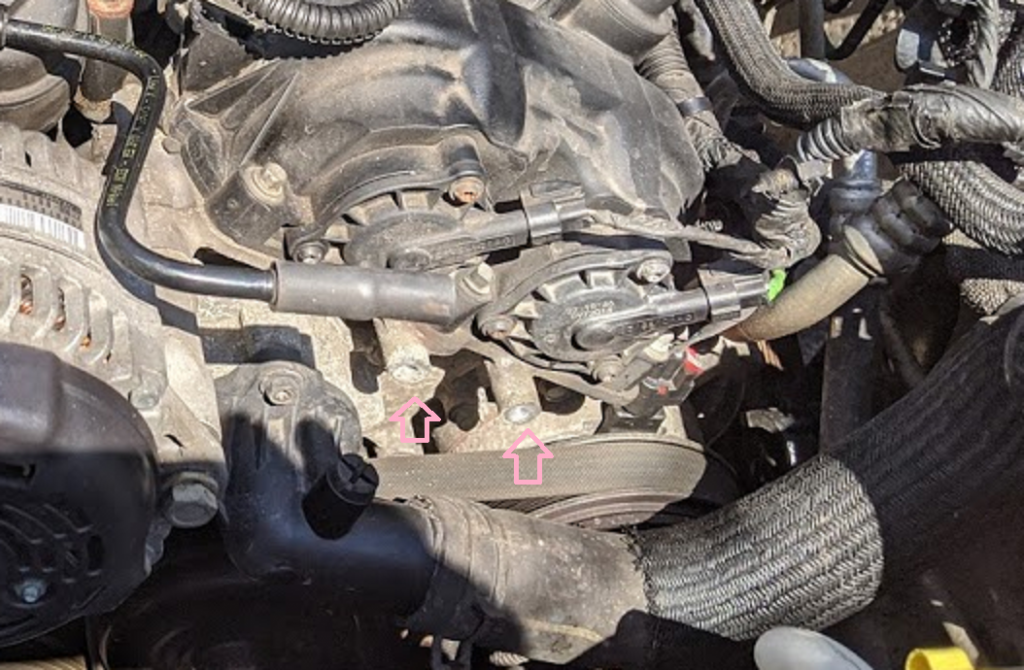
- 8mm socket – loosen the plenum bolts all the way. They will stay in the plenum. But, at 6:05 you can see that most of the bolts are still just loosened. One of them has been reversed enough that it is sticking up. Once the bolts are out of their screw holes and are loose, unscrew them a bit and they will all stick up into the plenum and stay there. Doing this will stop them from dropping back down into their normal holes and prevent you from easily removing the plenum. You want them to look like the orange bolt below.
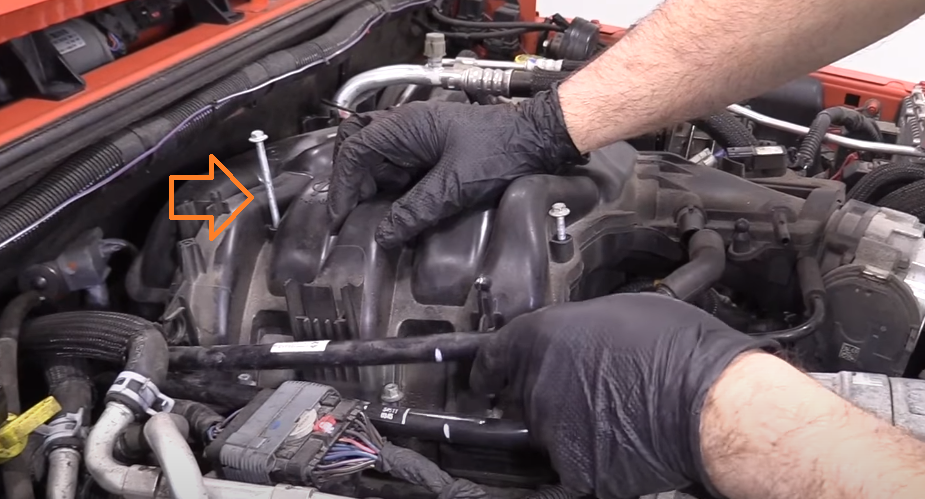
- At 8:00 he suggests loosening that back bracket. No need to. With the bracket nuts/bolts you removed on the left side, and the front bracket removed, and the bolts in the plenum screwed a little into the plenum, it will come off really easily.
And that’s about it. You will figure it out from there.