WARNING DISCLAIMER! This post is about a DIY configuration of an AC system that is intended for educational purposes only. Any liability is on you.
The methods described herein can not only damage the environment by releasing dangerous gasses, cause catastrophic damage to you by coming into contact with these gasses which can just about instantly freeze fingers or eyes, but also destroy your equipment. Be smart and call a local professional who knows about these things. Read the comments for some really good advice and further warnings.
We’ve had our Fujitsu AOU18RLQ Minisplit for about 7 years.
It’s one of those things that you always mean to get to, but prioritize something else. I knew it wasn’t cooling as well as it should, but us humans just get used to things sometimes. It was time to do something about it.
There are two major components to maintaining mini-splits:
- Cleaning the indoor head unit
- Recharging the refrigerant gas (R410A) in the outside condenser unit
I will be covering how I re-charged the condenser unit only.
The best thing in the world to have is a remote temperature gun. You point the laser at the target and you read the temperature. I own this one. There are dozens of them out there.

When you get it you will spend at least an entire day taking temps of everything. You can also turn the laser off to temp your pets. The laser will blind, so be careful.
It was 98 degrees with about 80% humidity and I temped the inside of the exhaust of the head unit.
The cool air was 82 degrees! Something was definitely wrong because I had a delta of 16 degrees between outside and inside. So no wonder our electric bill was so high last month!
Something had to be done! I did a ton of research and then called for estimates.
“It’s out of warranty. The problem isn’t gas pressure.”
“It’s gas pressure. $875 to re-charge the system plus time on site, etc, etc. It will be two weeks.”
On it went. People in the ‘burbs will pay a lot less, but spending over $800 was not going to happen.
After much googling, and watching endless youtube watching, I decided that I would buy a full tank of R410A and an AC manifold – there was nothing really about DIY minisplit charging, so getting semi-pro equipment seemed the way to go.
I spent much time looking for these, hemming and hawing. If I was going to spend $800 it would be on equipment that I can maintain the AC system with and DIM – Do It Myself.
I stumbled on this site http://www.refrigerantguys.com/ and searched R410A and luckily went to page 2. And there it was:

A mini-sized bottle of R410A for $44!
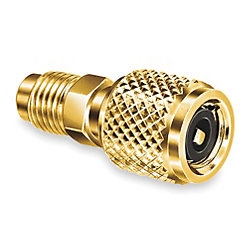
I then found this to connect it to the condenser.

After doing much more reading, I wasn’t sure of the size of the coupler I might need, so I called and spoke to the owner – sorry, I can’t remember his name, but he was so nice and helpful. He said that buying it without it is a mistake, so just get it. For $4 I agreed.
A week later I had my whole kit (can only be shipped ground so YMMV).
Here is the process he told me to use:
- Take off the cover to reveal the charging port. Minisplits do not have a high pressure charging port, only a low pressure one. It should be a three-way valve:

- Screw the tank and charging valve together.
- Wear heavy gloves
- Take off the cap (where the arrow is pointing) with a C-wrench
- Test if you need the coupler. If you do, attach the coupler to the charging hose. Use pliers and a wrench to make a good connection. It’s brass, so don’t go crazy. Practice in your mind how you will screw this on to the valve. It is a schraeder valve like a car tire valve, so pressing in will open the valve.
- Attach the charging assembly to the port as quickly as you can and turn on the unit. The gauge you are using may only show the correct pressure once it is running!


- Look at how low it was!
- I called my SO who was inside and had her turn on the unit. It must be running on High Cool (not auto – High and low temp setting, maybe 65 degrees).
- After 5 minutes she temped the output of the inside unit (aim the laser deep inside the bottom part): 75 degrees (outside temp was close to that)
- Fully depress the charging button (you can see it to the left of the gauge for a ten count. The pressure might jump into the blue or yellow at this point.
- Stop. Let the unit run for 2 minutes. Output temp was now 72 degrees and I could feel a rise in the condenser fan heat. The pressure gauge will come back down.
- Repeat this process until the pressure stabilizes in the blue area. The sound of the compressor will change as more gas is added to the system. Don’t rush it. 10 seconds, let it run, repeat.
- My system took the entire tank:

- The proof is in the pudding: After running the system for a good ten minutes I temped the output: 58 degrees. FIFTY EIGHT! That’s a significant difference. A couple times I read 55!

- Your gloves are still on when you quickly unscrew the valve and replace the cover.
- Run the system for a good 30 minutes (if you plan to turn it off). Otherwise, enjoy much higher efficiency and cold air instead of lukewarm.


You’re welcome.
Stupid question…..I have 4 indoor units connected to my single outdoor unit. Do I have to fill each low pressure connection, or do I only need to worry about filling one, and it’ll disperse the coolant to each indoor unit on it’s own?
Sorry – I don’t know for certain as I’m not familiar with multi-zone systems. If you get me the brand/model I’ll happily take a look.
Yes it will disperse throughout.
Holy smokes.
I’m a huge DIYer and IT guy by trade but this is so stupid wrong it’s unbelievable.
Mini splits are charged by weight and WEIGHT ONLY. You need a can of 410a and a scale. The system should be recovered and a vacuum pulled. The base charge will be on the sticker on the side, and any additional charge is calculated by additional feet of lineset ( I was googling for that spec and stumbled across this treasure trove of bad advice).
Secondly, these things don’t need a recharge unless something is wrong and there’s a leak. And if there is, you should hit it all with some soapy water and find out where the leak is and then rinse off the soapy water.
The most important part of all this is that the system should be pulled down with a vacuum pump, but your issue is that if there’s a leak, it’s pulling contaminants into the system. That’s why you should leak test with nitrogen first, fix any leaks, and then vacuum to a low micron count like 500 or so.
This all is why a proper job from an hvac person costs 4-800 dollars and why I got into doing it myself and for my company internally. That said, I’ve got about $2500 tied up in manifolds, scales, vacuum pumps, nitro tanks, etc.
Or do it the wrong way and potentially burn up a $1500 plus minisplit, and then have to pay double that to have a pro replace it correctly.
so true
Disregard E. as he’s evidently doing too many “Holy smokes”.
The system was low on refrigerant and still functioning…there is no way for it to “pull contaminants into the system” as the internal pressure is higher than atmospheric and contaminants can’t flow against pressure.
Minisplits CAN be charged by weight. They can ALSO be charged by superheat calcs. The gauge is a poor-man’s version of that…albeit not perfect. JF got the better bang for the buck than E. Or maybe E just wanted to rant because he’s proud of how much he spent on tools.
Please DO NOT disregard E. I am in the field and have actually been through Fujitsu training. He is absolutely correct Fujitsu should ONLY be charged by weight. There is no such thing as charging them by superheat because they do not have fixed metering devices they modulate depending on many factors resulting in a change in superheat constantly. If you have to add there is certainly a leak and you will be adding again shortly if you do not address and fix the issue.
So far, so good a year later. Again, the cost in NYC of this, especially during the Summer and where the unit is located is just not feasible.
I’m not arguing with you, though – you are correct that this should be done by a professional, but sometimes it just doesn’t make any sense. If the unit was under warranty we would, but it is getting on 9 years old.
To add, because I’m sure you believe I’m wrong and that the neat little gauge told you that it’s right – that gauge is fooling you. There are metering devices on both the high and low side of a minisplit whereas a traditional split (central ) only has a metering device on the liquid side at the indoor coil. So the low side is always going to have some off and low reading, and then boom there’s too much liquid and it hits the compressor and locks it up.
Granted you probably cannot do that with that little can, but again this is why they are charged by weight because you don’t know how much is sitting behind the compressor. You also typically charge with liquid and have the can upside down, but who knows what’s actually in that little can.
I get that you’re laughing at his tools and supplies, but I don’t get what your legitimate concerns are. His A/C is demonstrably cooling much better after his DIY; are you concerned that the system will have less life going forward, compared to if it had been done as you describe? Or is there some kind of immediate danger to his safety?
I get that you’re laughing at his tools and supplies, but I don’t get what your legitimate concerns are. His A/C is demonstrably cooling much better after his DIY; are you concerned that the system will have less life going forward, compared to if it had been done as you describe? Or is there some kind of immediate danger to his safety?
And to answer Joe’s question. No, only one port gets charged and there is a single accumulator with a single compressor. Again, each outlet has a metering device.
And again… THIS IS WHY THEY ARE CHARGED BY WEIGHT!!!
All good points and buyer beware.
Where I live, the maintenance would have been $1,500, minimum, and a 2-3 week wait. In addition, the original installation has lines running on the side of a building 5 stories up.
Since the unit is getting on 8 years old and we had another burn out (on it’s own – no servicing done), we opted for the cheap fix. So far, so good.
Hi JF, thanks for sharing how to charge the Fujitsu condenser unit. I have a 8y rs old condenser unit AOY30LMAW4 and I need to charge R410a gas every 6 month. Obviously there is a leak but sadly the leak seem to be coming from a section of the copper tubing concealed in my false ceiling. I own a hydraulic piping company and does high and low pressure testing and flushing services and so I consider myself qualified to troubleshoot a leak. I search the internet to find scraps of information on how to charge the condenser unit. What you describe is exactly what I did except that I didn’t checked the temperature difference.
Whenever the Fujitsu technician come to service my condenser, I would observe what they are doing and asked questions on how they do the charging. I questioned them why they were charging my condenser not based on weight but rather on the pressure gauge reading. Their answer was always ‘by right’ you should do this but ‘by left’ they charged based on pressure reading! After paying expensive ‘tuition fee’ to learn the procedures of charging, I took the plunge and bought the 25lbs R410a gas cylinder and basic charging manifold kit. I did what you did except that I stop charging at about 120 psi. This simple DIY saved me a few hundred dollars a years!
That’s terrific, YC!
Glad it helped and also glad you can be in nice, cool air 🙂
I have just installed a 2 zone Fujitsu mini split yesterday, A friend of mine who had installed 3 on his home (single zone units) 5 years ago gave me a hand. We vacuumed the system shut off the pump and slowly opened the units refrigerant values. We heard the refrigerant hiss from one of the zone valves but not the other, then we leak tested all the lines with very soapy water no leaks. Point is the zones are not blowing cold air and no condensation is dripping from drain tubes. Could someone reply with trouble shooting tips.
Greg: did you open both valves for each zone? There is one in both high pressure and low pressure lines. Can you hear the pump running and is the fan running on the outside unit?
An accurate charge is VERY important in any AC or Refrigeration system. Even more so now with 410A systems. Older R-22 units had some wiggle room regarding charge, but in 410A systems, it is critical to not be over or undercharged. Either one can cause damage to the compressor. Overcharging will flood the compressor.
That is why most manufacturers require you to charge by weight (using the precharge and calculating the extra based on line set length).
On ductless systems, the most common culprit for leaks, is the flared fittings. Either they were not flared correctly, not tightened enough, or over tightened… and the majority of the time its the fittings that connect the indoor head to the lineset.
I did the full vacuum (2hrs), tested for leak with nitrogen and filled to weight spec (7.4 lbs) Not getting as I cold as it should. Do any of you know how much extra refrigerant is too much on a 36k unit? How much refrigerant is lost when diconecting the hose on average?
Which hose is that your using? With the gauge?
Hi Nelson,
The hose came with the gauge. Definitely get that adapter in case you have the older size.
Critical Charging ( weighing the refrigerant in ) and doing the proper math per additional feet of lineset is the only way to charge a minisplit or multi zone minisplit. Yes you may have gotten the air to come out at 55 or 58 degrees. But it may be missing refrigerant or over charged if that is what you are basing it off of. You may have a compressor burn out soon if its running to high on head pressure or a unit that doesnt cool that great when its 100 degrees outside. All manufacturer manuals are available online at their website just look for them.
Hi John,
As I’ve said before: I totally agree.
However, based on where we are and the life of the system, how shoddily it was installed, and the unbelievable maintenance and installation costs of a new system here in a big city, we’re gambling and going this route.
2 years on and things are going well.
If I lived in the ‘burbs I would have let a professional deal with it as, quite frankly, anyone reading this article should.
My only question with the method you used to recharge it, how does the air that is in the blue hose connected to the can not get into the system? I understand once you connect the hose to the charging valve the pressure comes into the hose, but where does the air that was in the blue hose go? It seems when you start to do your ten second pulses to add the refrigerant, the air that was in the hose would be pushed into the line set. Am I missing something about the function of these charging cans?
Did you mean, “…. blue hose connected to the can
notget into the system? I only know the basic mechanics (as I said, I’m not a pro): The “low” side is the refrigerant that is coming from the evaporator (the head unit inside your house in this case) and is on its way back to the outside compressor.So, I assume that the pressure of the bottled refrigerant is higher than the low side AND that since the condenser creates a vacuum of sorts, it is “sucking” the added refrigerant into the system (that’s why the system needs to be running when adding the refrigerant ). Here’s a good reference for it: https://www.swtc.edu/Ag_Power/air_conditioning/lecture/basic_cycle.htm
I’m the owner of a Dual Zone Fujitsu ductless mini-split system composed of a Model# AOU18RLXFZ outdoor condenser unit and a pair of indoor Ceiling cassette /evaporators units Model AUU9RLF-9RLF_. I have reviewed and/or studied the documentation followed by my own self motivated desire to install this in my home. I did it all. It performed just fine for a year. Now it has a leak which is being investigated by me. I have all the tools required and recommended as fully described in the Installation Manuals.
Basically I agree with most of the prior contributing posts offered. As I’m now a witness I would offer the following tidbits which are documented. These products as described in the documentation I own for my systems includes Electrical and the Mechanical system “FLOW” diagram for the Condenser. Both these documents clearly present the use of two Expansion valves which are wired to the Main PCB board. The actual electrical PCB schematic is not a furnish document and will prevent me and most owners from attaining further knowledge as to the actual control logic and various input/output results which these units employ. (hardwire remotes, wireless remotes, etc). There’s also the following items which IN my opinion are key players in all the various operations .
For each evaporator 4 thermistors and the condenser unit adds 5 more thermistors. Now it may surprise some OWNERS (not all) that there’s also a reservoir tank with-in the condenser unit which is shipped with more R410a refrigerant (excess) then needed for those owner(s) who may have shorter line-sets. The “weighing-in refrigerant” as a absolute requirement would be a task we DIY’ers need to have some concern for (maybe)….The question of how serious a leak is involved needs some analysis. The simple fact that there most likely a leak is simply apparent….followed by where’s the leak. There’s a better then 50/50 chance it’s at a fitting. >>>NOW what? That’s where I’m at as of this moment, and with this effort to post this message, to anybody who shares this situation. GOOD LUCK.
This knowledge as offered here leads me to think that anybody who has a “LACK ON COOLING” issue probably has a leak. This assumption is perhaps a no-brainer if you’re the only person who uses this HVAC system. (ME and WIFE). I’m about to purchase a leak saver (detect/fixer) product. This product appears to me to be a good preventive measure that can be included in the “recharging” efforts we DYI’ers might entertain. So, I’m going to purchase the two hose valve & guage and the LEAK_SAVER products. Wish me luck.. > ron_of_orange > Nov 11, 2019.
Thanks for the post.
As it turns out, I had a new person come take a look. They basically said it’s not worth their time looking for a leak. The labor cost alone would be much more worthwhile to put towards a new system. Of course that is their value statement to us and the installation cost is ridiculous in the city compared to the ‘burbs, but there it is. They suggested I also try the leak stop and next cooling season I will. Worth noting that all connections were snugged up much tighter – they were surprisingly loose.
Good luck let us know what happens!
I’m in a “Holding Pattern”…I’ve contacted an outside service called HOME ADVISOR…just for the off chance they actually have a local Service contractor whose familiar with Fujitsu Heat Pumps. I’m entertaining the thoughts I might be able to share some of the Evacuation/Recharging tasks that Fujitsu outlines very briefly in the Owner’s manual. I have the equipment to this myself but if I can share or break the efforts into two parts.
1: evacuation into my recovery canister (tank)
2: RE-charging (weighing-in) the correct Freon. In-between these two operations is a an opportunity for me to perform the leak FINDING and TESTING which includes pulling down a VACUUM to Fujitsu guidelines (approx 300 microns). I’ve done this before and it is very time consuming ($$$ EXPENSIVE$$$).
More later… Ron 12/4/2019
Good luck and let us know how it turns out 🙂
Well when you find teflon tape hanging out of flare nuts, it should come as no surprise they didn’t get torqued correctly. Yikes.
Unreal, right?
The schrader valve at the service port is another common source of leaks. Use soapy water on it or buy a 410a leak tester on amazon for $20. If it’s leaking there is a nifty tool for under $50 that will let you replace the valve without opening the system.
Yes, and that’s a good reminder. I do have a core removal tool, but unfortunately the Fujitsu valves don’t allow for using the tools I have…the valve body is mounted in such a way as to prevent a straight-in approach. I believe I can close off the valve (3-way Valve Assy 9375103019) with the Allen head wrench, but that would still leave me with a lineset connected and it’s under vacuum as it’s provided setup (per design). So, now I have to consider evacuating the system. Fujitsu would instruct the user (ME) to execute a “PUMP DOWN” to store the refrigerant within the condenser unit (there’s a receiver tank). cut and pasted from Fujitsu >>> PUMP DOWN OPERATION
To avoid discharging refrigerant into the atmosphere at the time of relocation or disposal,
recover refrigerant by doing the cooling operation or forced cooling operation according
to the following procedure. (When the cooling operation cannot start in winter, and so on,
start the forced cooling operation.)
(1) Do the air purging of the charge hose by connecting the charging hose of gauge
manifold to the charging port of 3 way valve (At lease one unit of connected units) and
opening the low pressure valve slightly.
(2) Close the valve stem of 2 way valve (All connected units) completely.
(3) Start the cooling operation or following forced cooling operation. (All connected
units) When using the remote control unit Press the TEST RUN button after starting
the cooling operation by the remote control unit. The operation indicator lamp and
timer indicator lamp will begin to flash simultaneously during test run. When using
the MANUAL AUTO button of the indoor unit (The remote control unit is lost, and so
on.) Keep on pressing the MANUAL AUTO button of the indoor unit for more than 10
seconds. (The forced cooling operation cannot start if the MANUAL AUTO button is not
kept on pressing for more than 10 seconds.)
(4) Close the valve stem of 3 way valve (All connected units) when the reading on the
compound pressure gauge becomes 7.3 to 0 psi (0.05 to 0 MPa).
(5) Stop the operation. (All connected units) Press the START/STOP button of the remote
control unit to stop the operation. Press the MANUAL AUTO button when stopping the
operation from indoor unit side. (It is not necessary to press on keeping for more than
10 seconds.) ron 12/29/2019 Note: I see this as the only way to add R410a without opening the existing lines.
Did you challenge Fujitsu on their design not allowing core removal tool use. Why would they do that?
I see a lot of talk regarding how critical it is that these systems have the exact right charge. The system i bought came pre-charged from the factory. The factory states that it is pre-charged for a 16′ to 25′ line set. any longer and it will need additional charge. that being said…. a 25′ line as way longer than a 16′ line. about 35% longer.. yet both work with the same charge from the factory. so is it really that critical? or will it just improve performance a little bit? or is there something about the way these are charged at the factory that I’m missing? I’m a newb, just observation. Cheers
Seriously it’s not critical more damage done by vacuuming down and removing oil from the condenser, it’s known as a source of problems.
Remember when they install they only vacuum the external pipes and head unit *NOT* the outdoor unit / compressor. It really should be left alone and I think getting it re-charged properly is more than likely a factory job surprise surprise! So yeah Fujitsu may well tell you to completely vacuum it and re-charge it but the ‘professionals’ probably leave out that tiny bit about needing to replenish the compressor oil (Afaik that’s a job for Fujitsu and unless you’re doing commercial stuff I bet it would cost more than a new unit).
Remember how you have to let your fridge freezer settle for a few hours when you first have it installed before turning it on because without oil in the compressor they’re known to overheat and pack up pretty fast (tilting your fridge freezer makes the oil flow out of the compressor). It’s way more important than having exactly the right amount of gas inside them. The amount of gas determines the maximum cooling up to the point where you overload the compressor and it breaks down but if you stay below that you’re not doing any harm to the compressor, granted it shuts down when it’s really low on gas (mine was still going even with very little gas just doesn’t get cool). It’s an inverter unit anyway (like most modern units) so it wont be going full tilt unless you select maximum cooling so you really are pretty safe normally.
Yes, be very careful of the so called ‘pro’ advice from the certified engineers it’s often worse than the advice from DIYers. Personally I found JFs guide helpful because it says what will work and gives clear easy details about what to do. No doubt why there was so much bitching about it!
First actually fairly well known issue with completely vacuuming the system is that it pulls a lot of oil out of the compressor. It is known to substantially cut the life of the unit down! That’s why they come pre-charged. Funny how those engineers are trying to scare you into doing something that will not only cost more than getting a new unit installed but will likely lead to your existing unit breaking down prematurely. Oh and that would ofc be with ‘old age’ and nothing to do with any damage from the re-charge.
Also it’s funny how I got my system professionally (f-gas certified) installed with a nitrogen +ve pressure test etc. and it was low on gas after 1 year.
Also funny how I get another so called professional f-gas certified engineer to come and fix this and it’s low on gas again after less than 1 year. He allegedly found a leak, fixed it and claimed it would probably be good for 10 years but actually all he did was tighten up a loose joint that he also acknowledged always come loose due to expansion and contraction. So no Teflon tape, no thread lock and no professional repair funny how they talk about one thing and do another. He was quite unpleasant man so I wanted him to leave anyway. Oh and for the record he just topped the system up using a gas can using guess work and the manifold gauge. He did make a note of how much extra gas he used but that was so he could bill me, he had no idea how much was left in the system. So yeah they may talk down to you on here but bet half would still have just topped it off because it’s less work. So just to confirmed so called f-gas professionally certified engineers still just top up like you did anyway. He didn’t invert the bottle, looked too heavy to do that and sure he would of made a good excuse about it anyway.
Almost all the quotes to get a leak fixed were like yours, more than getting a replacement system for sure especially as some of the install work could be re-used. Some were insanely expensive like more than the cost of a new better system! Anyway thanks for the guide because after 2 botched professional installs I think I’m going to DIY it and I will likely be no worse off than getting another botched professional job, funny how those ‘professional’ jobs always seem to make a never ending stream of work due to needing constant repairs. No excuse really makes a complete joke of the f-gas rules, gov should be ashamed of itself as these guys are just allowing leaks to go unfixed to get more work!
The difference is they’re allowed to waste refrigerant because they’re certified to do so and we’re not! The irony is that unlike them I really don’t want to add to the world’s pollution by wasting refrigerant! My advice to this industry is if you’re going to bitch and moan with the old ‘only a pro’ can do this job routine at least do it properly!
It’s the same old story use fear and doubt to scare people away from doing things. Make terminology and guides ambiguous and confusing so everyone gives up. The truth often seems to be inverted though, the ‘professionals’ are just hoping that when all that extra work comes up you’ll believe their excuses because they’re ‘professionals’.
Actually the maximum pressure is written on the rating plate anyway so you’re probably safe if you stay below that and allow a little headroom. You can write all manner of BS on having to do it a certain way but I don’t think it will break down on too little gas. The advice I’ve seen actually says you’re better off going under i.e. not beer can cool at the other end or you’ll overload the compressor. So nonsense about having a perfect amount of gas inside is just more scare mongering. That’s really just an excuse to be a pedant if you want the system performing exactly up to spec without overloading the compressor. You’re not going to break it by going under you’ll just be off spec and as stated above anyway the spec is just a range depending on how much pipe work you have!
Ron’s update 5/11/2020
http://www.phaseoutfacts.org/common+recovery+methods+explained.aspx
pasted below here.
Common Recovery Methods Explained (w/ red marks by and for me)
The three different recovery methods are: vapor recovery; the push-pull method; and the liquid recovery method.
Vapor Recovery >>> Q: My Fujitsu procedure is to select a push out into a tank and a scale using the condenser I think! REferred to as “forced cooling”
In the vapor recovery method, the refrigerant is removed from the HVAC system in a vapor state. The vapor is then condensed into a liquid by the recovery unit and transferred to the recovery cylinder. (I don’t have a recovery unit)
Vapor Recovery Process (not applicable to push-pull or liquid recovery method)
1. Turn off the HVAC system as well as the recovery machine. Q: description needed. I don’t have recovery machine!
2. Connect a hose with a low-loss fitting on both ends to the discharge side of the recovery equipment.
3. Connect the other end of this hose to the tank liquid port on the recovery cylinder.
4. Place the recovery cylinder on a scale. OK
5. Connect a hose from the low-side service port of the air conditioning system.
6. Connect the other end of this hose to the center (charging) port of your manifold set. comment by me = I have new set.
7. Connect a hose to the low-side of your manifold set.
8. Connect the other end of this hose to the suction side of the recovery equipment. Q: description?
9. Connect a hose from the tank vapor port to the high gauge on the manifold set. This will allow you to monitor the tank pressure.
10. Close valves on manifold set.
11. Open vapor and liquid valves on the recovery cylinder.
12. Start the recovery system. Q: description needed… (I’m not using a Recovery unit) Hoping to complete without.
13. Allow unit to pull into the appropriate vacuum based on refrigerant type. Q: Weigh-in “per Fujitsu” applied here?
14. Close all valves and disconnect from the air conditioning system or begin purge cycle.
Q: Nitrogen leak test is next? This could be confusing information if your system has been opened to atmosphere. I’m avoiding this situation. The Fujitsu weigh-in method is instructing me (us) to use the “forced cooling” procedure. I’m hoping the system is tight enough after I’ve also included the use of the product that I purchased along with the two hose valve & guage and the LEAK_SAVER products. url: https://www.leaksavers.com/products/leak-saver-direct-inject
Just finished doing this on the Fujitsu multi-zone that came with the house I’ve been living in for five years. I’m not exactly sure when it was installed but I want to say 2011/12. This season was the first I noticed performance issues – it feeds the main living room and the master bedroom. I have another identical unit feeding 3 other rooms without an issue. Anyways, I checked the output temps when calling for max cool and they were roughly the ambient outdoor temp (mid 80’s). Got a similar kit to the one you linked, and a 5/16” 45-degree adapter, and filled up the bedroom zone – output temp is now in low 40’s! Once the bedroom zone was stable I started filling the living room zone and think I ran the bottle empty. That unit is only outputting ~10F below ambient, so I probably need to pick up another bottle and finish it off. I stopped running that zone in case it would affect the bedroom.
All the flares at the compressor seemed tight per the soapy water check. I’ll check the indoor connections when I clean the units. I know this is not be the technician/mfr approved resolution, but it got the desired result for the same cost out of pocket just to get a technician here to look at it. I look at it as buying myself time to climb the learning curve for a permanent resolution. Thanks for the write-up!
Awesome and glad it could help, especially in these crazy times!
All,
Quick question, on my Fujitsu unit both valves are 3 way. One has a thin pipe ( I assume it is liquid) and another is much wider ( which is probably gas). If I am to top off with some refrigerant, do I connect to the liquid valve ( which is smaller). Also, does it matter to witch one to connect? Thanks in advance…
I would assume that the wider tube is the low pressure port, which is the charge port on mine. I would look up the maintenance manual for your model and see which one is the charge port. I would also confirm the type of refrigerant.
I am definitely not an expert in this.