I have a LAARS HT 330 gas fired condensing boiler that speaks neotherm. Baxi has been around forever in the EU. I love this boiler. It is easy to maintain and has been bulletproof. It’s only problem is bringing it up to modern standards.
If you’re DIY then there might be some information that you might find userful. You also probably know about Boston Heating Supply and Parts 4 Heating, both excellent resources for parts and manuals. As usual, do this at your own risk.
Useful Links
There is some really useful information in here considering that the LAARS manuals for the HT 330 are confusing and just plain incorrect in some situations. In addition, the LAARS version of the Baxi has an additional component added for the US that does not exist in the EU.
All of the LAARS manuals at Boston Heating Supply
LAARS HT 330 Installation Manual
- Has no mention of the additional 24 Volt thermostat connection with solenoid (see below for link to the additional document which also has incorrect information in it)
- On page 33 it describes a setting that simply does not exist. There is only a snow icon or a sun icon.

It even says the same thing in the Baxi Luna HT 380 instructions from the Baxi boilers website!:

Again, this setting does not exist. There is only R, winter, and summer:

However, on Page 45 of the same manual it says it correctly:

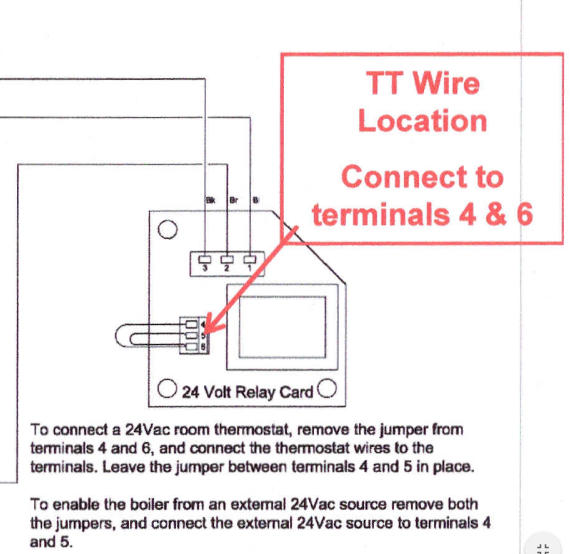
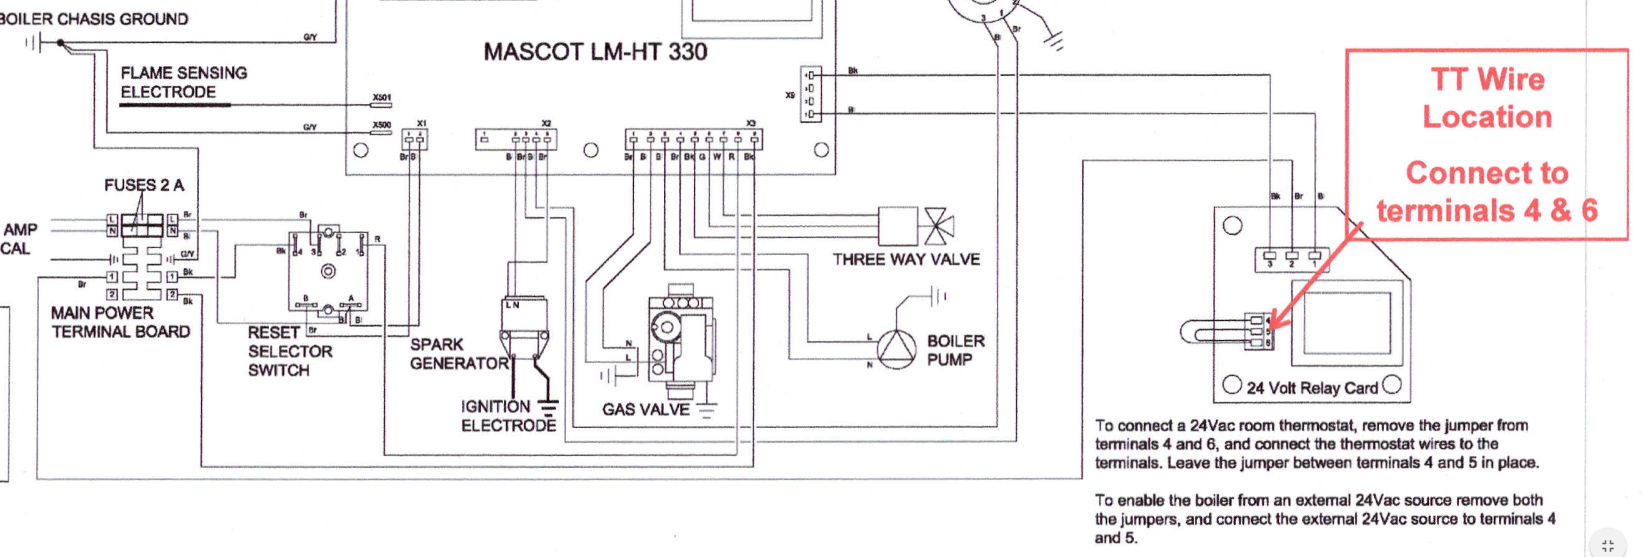
LAARS Mascot HT 330 Wiring Thermostat Connection
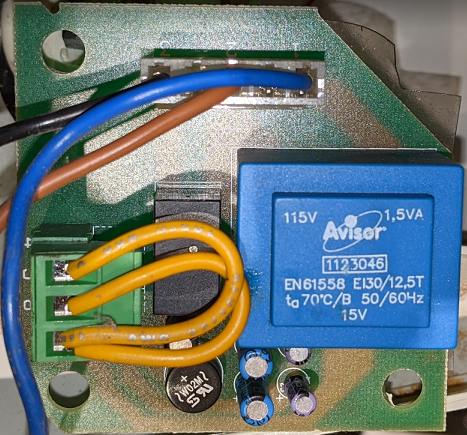
This is the wiring of the US LAARS HT 330. It includes a “24 Volt Relay Card”. The instructions are wrong!
Note the jumpers are between 4&6 and 5&6. The instruction say, “leave the jumper between terminals 4 and 5 in place”. I assume they meant 5&6 in place, but this extra piece of kit in the US version outputted 0 voltage, so it never worked. I tried removing the jumper 4&6, testing the voltage: 0 volts. I even traced everything on the bottom of the board and looked at the schematic for the transformer/solenoid and couldn’t get it to output 24 volts with different jumpers.
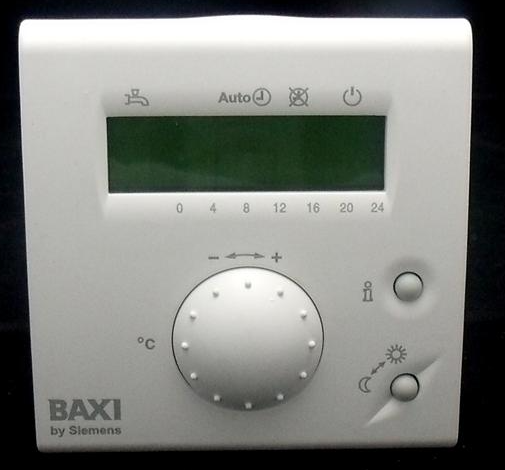
FYI: you can connect the QAA73 to the M2 board and use it to control the boiler. However, it will not act as a thermostat.
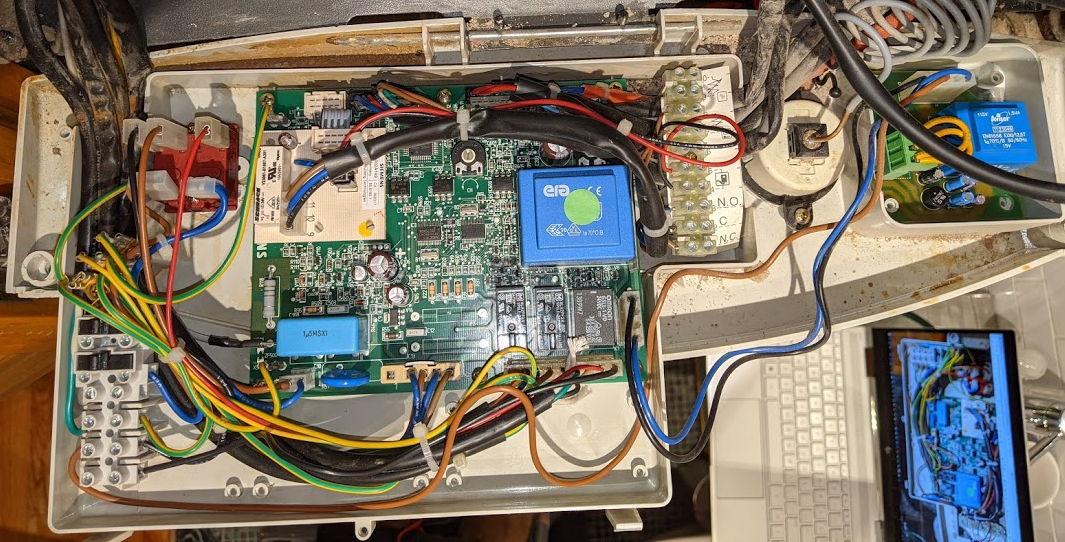
Here’s a picture of the entire installation in the LAARTS HT 330:
Theoretically, you should be able to hook up a Nest or some other 24 volt compatible thermostat to that card. It never worked for me. I tested for 24V, etc.
For some reason, our HT 330 was not installed with a thermostat. I have no idea why. I decided to add one and bought the Siemens QAA73.
Good luck reading the instructions for the LAARS or Baxi. They both have the same instructions that are meant for the Baxi. However, there is a useful diagram in there for multizone systems which relates to the LAARS thermostat connection:
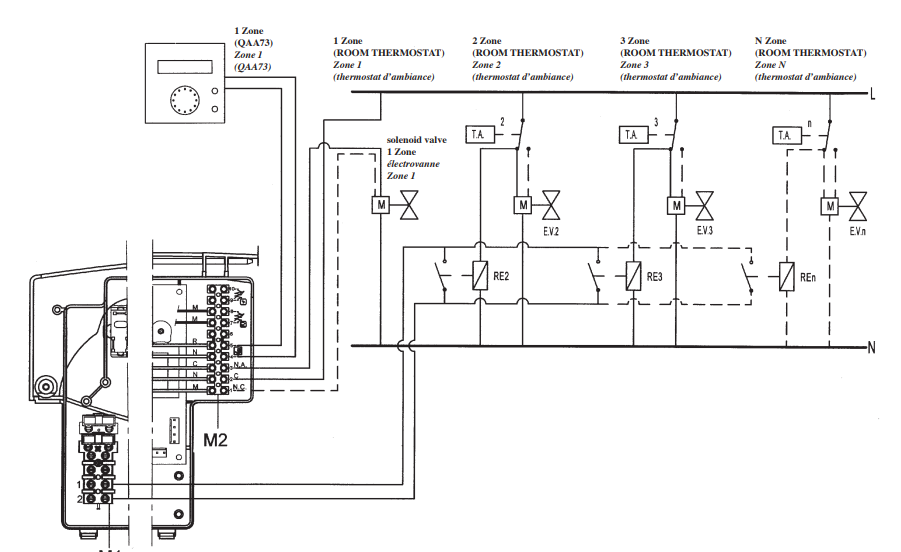
This is sort of how the 24V add on card is configured, but it is not connected to the M2 board. Instead, it is connected like this in the wiring thermostat diagram:
I finally figured out that because this board was not working it was interfering with adding a QAA73 Thermostat to the 4&5 ports on the M2 board -it will talk to the boiler, but will not act as a thermostat. I assume this interference came from how it was set up as a secondary zone? I’m not sure of that, but that is how it appears to be. Perhaps this would normally allow both the QAA73 and another thermostat to operate? I’m not sure.
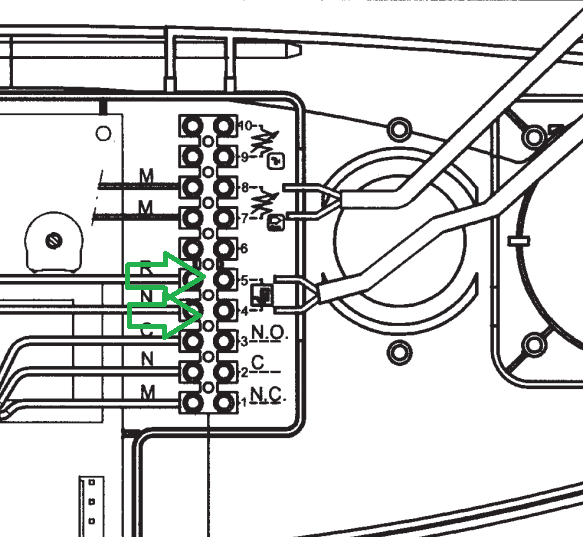
Here are the plugs to remove:
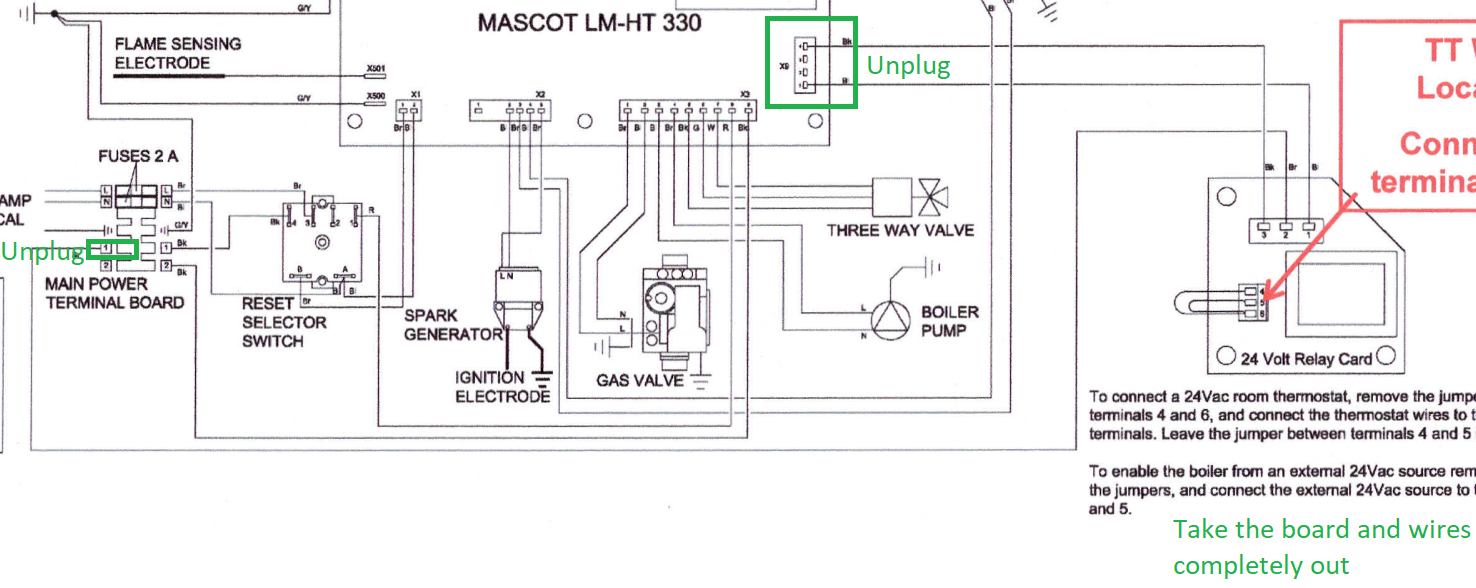
I removed the board, added the QAA73, and it worked perfectly!
Make sure to use solid thermostat wire (not stranded) for the connections. Also, the general rule of thumb is that the boiler should be set to Winter mode and turned all the way up (the left dial). YMMV on the last item.
Laars Mascot HT 330 Parts List
NeoTherm & Nest
LAARS/Baxi and other boilers use NeoTherm as their logic protocol. The boilers talk NeoTherm to the thermostats and vice-versa. This allows a thermostat to be located somewhere else and be able to get error messages, configure, and ask for heat from the boiler. Very handy.
There are not many thermostats in the US that talk NeoTherm, so your options are limited.
Nest does sell thermostats in Europe that talk NeoTherm. They are not for sale in the US.
However, Baxi USA now sells USense, a neotherm speaking thermostat for their newer boilers. It has WiFi and an app so it can be managed remotely. Boston Heating Supply can get one in a couple weeks for about $250.
Maintenance
Expansion Tank and/or Pressure Relief Valve
A common failure on the HT 330 over time is the built in expansion tank. Depending on your installation, a secondary installation tank may have been fitted. If that is the case, the internal one can go bad and you don’t have to worry about it.
If you don’t have an additional expansion tank and it dies (about 5-6 years, or more), the boiler will overpressure and hot water will come out of the pressure relief valve. Then there will be no pressure and the boiler will probably display the LAARS/Baxi E119 error.
Before doing anything, turn off all the water supply connections!
The first thing to do is check the pressure relief valve. It might have buildup inside it causing it to stay open. You can buy them just about anywhere – it does not need to be a Baxi part #. The instructions say it is 3/4″ 30 p.s.i. / 2.11 bar.
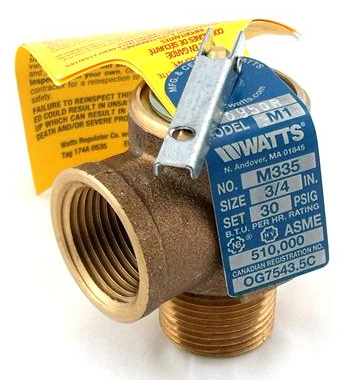
HYDRAULIC SAFETY VALVE ASSEMBLY 5669850
The second thing to do is check the pressure of the expansion tank. Inside the red tank is rubber bladder that needs to be filled with 11.6 psi of air. A regular bicycle valve pressure gauge and bicycle pump can be used.
If has failed it will no longer hold pressure and the system will simply overpressure and come out the PRV.
You can order from Boston Heating Supply, but make sure to get these parts:
VESSEL – EXPANSION 10L ZILMET Part # 5662630
WASHER – SEALING 5402080 (buy TWO of these)
Remember to let the system cool and drain it!
Be warned: the tank is not easy to get in and out. Mine is inside a closet so I can’t take the sides off, which would make it a lot easier to do.
Be very careful to not cross-thread the connections – it is easy to do! Take your time threading them back on and check that they are not super tight when you start wrenching on them. Any doubt? Back out and start over.
It is good maintenance to replace the PRV at the same time.
Filling Knob

This is what is used to fill the system with water. It can get brittle over time and the blue plastic can shred. If it seems like it is doing nothing, it might be that the nut inside the plastic is no longer turning with the plastic. Pull off the blue piece and use a wrench. Do not use a wrench on the actual connector or you will have house pressure water spraying everywhere.
If you need to replace it:
That about covers it. Good luck!