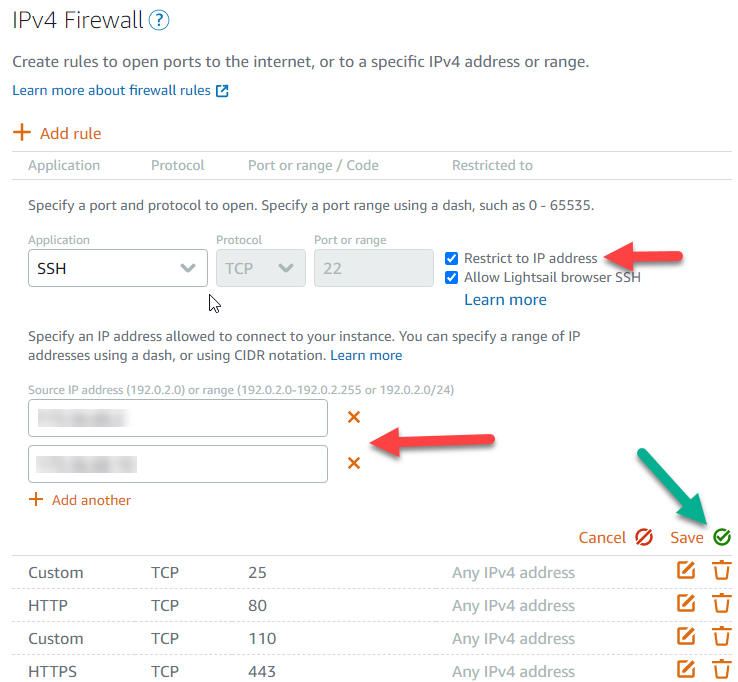
Configuring Lightsail Network
To make sure you can connect, make sure that Port 22 (default) is open. If you have a fixed IP address, make sure to check “Restrict to IP address” and add your address/es.
Remotely Connecting
Before we set up the server, let’s go over a couple key items:
- You’ve create the instance and a dedicated private key
- If you’re on windows, you downloaded the .pem and made it into a .ppk using puttygen
- You’re able to connect to the machine
- You will need the .pub key from the person you are about to create a user account for. On Windows, theoretically using puttygen, or other means.
Adding the user to the Lightsail Instance
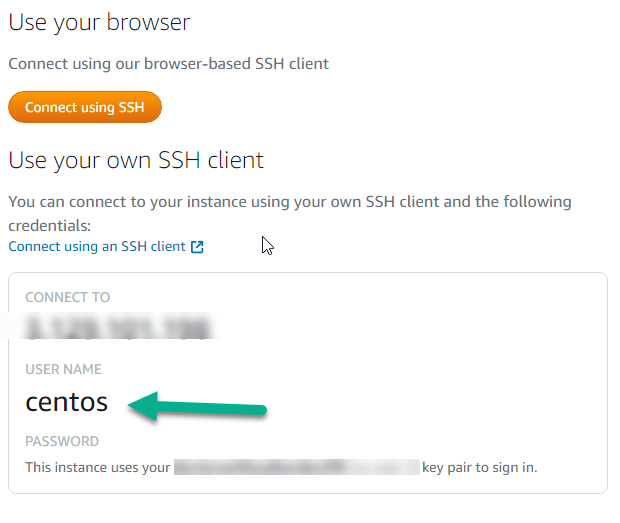
Connect to the instance. In this case we created a CentOS instance. Your username might be different. This is available under Connect. The IP Address and key pair are blurred out, obviously.
You can do this via the browser SSH login, but copy/pasting is easier through Putty.
We’re going to add user John Smith, or jsmith.
Note that the default user in a CentOS instance is centos.
Add the user
sudo useradd -s /bin/bash -o -u id -u -g id -g jsmith
Check to make sure their folder is in /home
sudo ls -la /home/
Copy some information from centos to that user to make it easy.
sudo mkdir ~jsmith/
sudo cp -rp ~centos/.ssh ~jsmith/
sudo cp -rp ~centos/.bashrc ~jsmith/
sudo cp -rp ~centos/.bash_profile ~jsmith/
Make the pub file of the new user and copy to the right place. Inside .ssh is a file called authorized_keys. We will want to add their .pub key to that file.
Assuming the new user sent you their .pub key, there are a couple ways to do this:
Upload the file to the server (file is called jsmith.pub in this example), then:
sudo cat jsmith.pub >> /home/jsmith/.ssh/authorized_keys
Or create a new file, then paste the contents (easiest to mess up). Also, I prefer nano (sudo yum -y install nano)
sudo nano jsmith.pubctrl + x to save and then y to confirm the savesudo cat jsmith.pub >> /home/jsmith/.ssh/authorized_keys
Make the new user part of the wheel group (if you want them as sudo admin)
sudo usermod -aG wheel jsmith
Delete the user, if desired
sudo userdel USERNAME -f